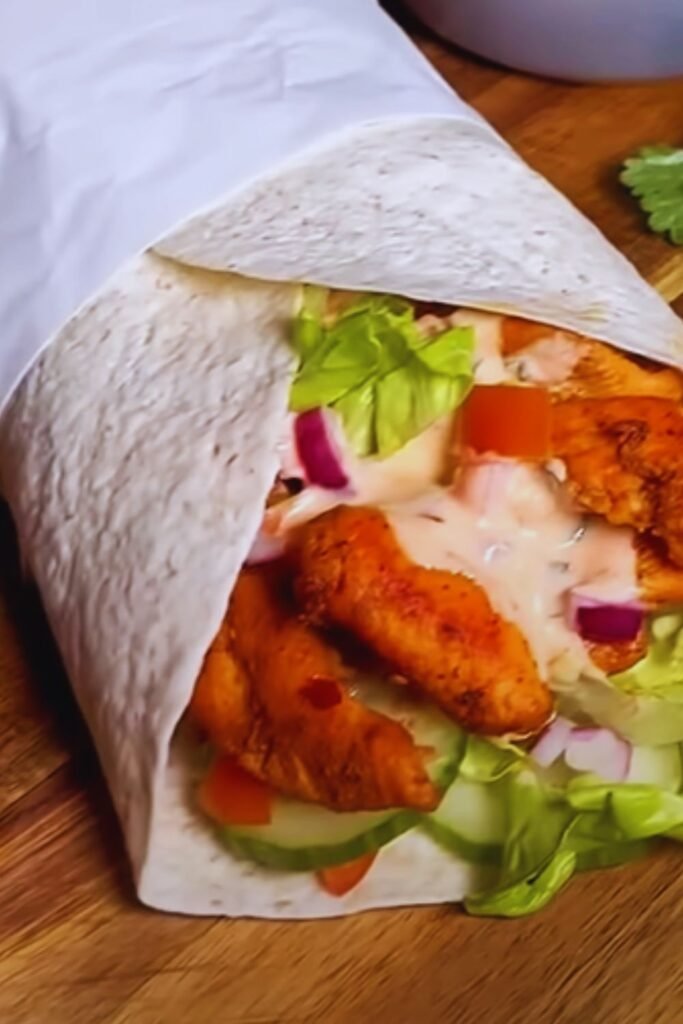
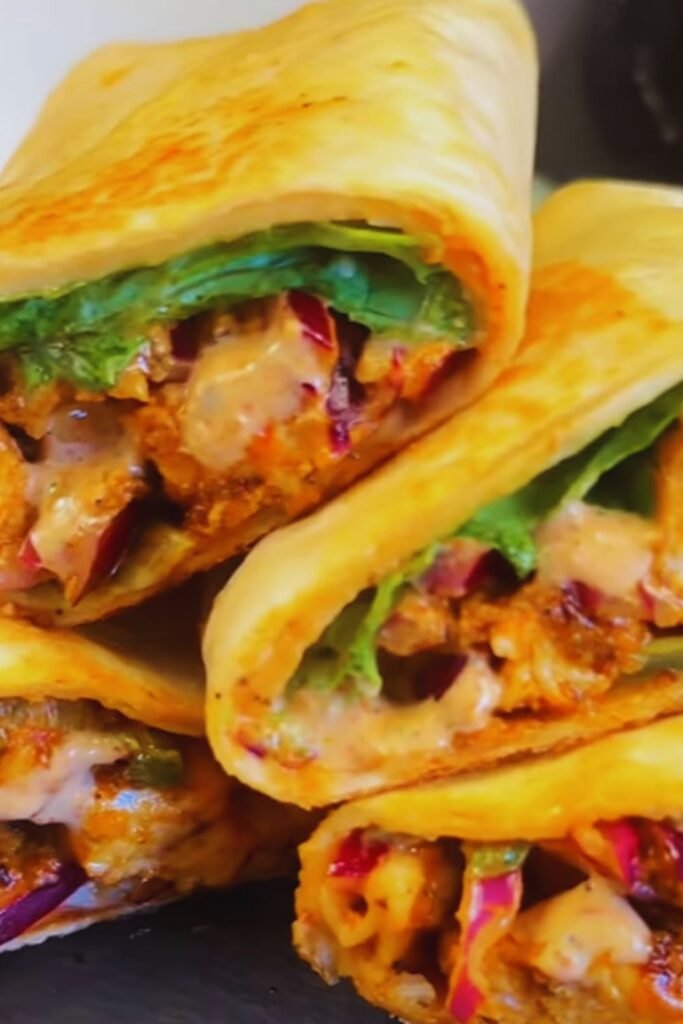
There’s something magical about the combination of melted cheese, aromatic garlic, and tender chicken all wrapped in a warm tortilla. As someone who juggles a busy work schedule with family commitments, I’m always on the lookout for recipes that deliver maximum flavor with minimum fuss. These Cheesy Garlic Chicken Wraps have become my go-to dinner option when I need something quick, satisfying, and crowd-pleasing.
What makes these wraps special isn’t just their irresistible flavor profile – it’s their incredible versatility. You can customize them endlessly based on what you have in your refrigerator, making them perfect for those evenings when you’re trying to use up leftover ingredients. They’re also fantastic for meal prep, as the components can be prepared ahead of time and assembled when hunger strikes.
In this article, I’ll walk you through my tried-and-tested recipe for Cheesy Garlic Chicken Wraps, share some tips for perfecting them, suggest variations to keep things interesting, and answer the most common questions I receive about this recipe. Whether you’re cooking for yourself, your family, or a gathering of friends, these wraps are guaranteed to impress.
The Magic Behind These Wraps
Before diving into the recipe, let me share why I think these wraps deserve a special place in your recipe collection:
- Balanced Nutrition: These wraps contain protein from chicken, complex carbohydrates from the tortillas, and a reasonable amount of fat from the cheese, making them a well-rounded meal.
- Customizable: Don’t have cheddar? Use mozzarella. Prefer beef to chicken? Make the swap. The basic formula works with countless ingredient combinations.
- Kid-Friendly: Even picky eaters tend to enjoy these wraps, especially if you let them choose their own fillings.
- Perfect for Leftovers: Leftover grilled or roasted chicken works beautifully in this recipe, giving you a completely different meal the second time around.
- Quick Preparation: From start to finish, you can have these wraps on the table in under 30 minutes.
Essential Ingredients
Let’s talk about what goes into these delectable wraps:
| Ingredient | Quantity | Notes |
|---|---|---|
| Boneless, skinless chicken breasts | 2 large (about 1 pound) | Can substitute with chicken thighs for more flavor |
| Large flour tortillas | 4-6 (8-inch diameter) | Whole wheat tortillas work well too |
| Garlic | 4-6 cloves, minced | Fresh is best, but jarred minced garlic works in a pinch |
| Shredded cheese blend | 2 cups | I recommend a mix of cheddar and mozzarella |
| Cream cheese | 4 oz | Brings creaminess and helps bind ingredients |
| Fresh spinach | 2 cups | Adds nutrition and color |
| Red bell pepper | 1 medium, thinly sliced | For crunch and sweetness |
| Red onion | 1/2 medium, thinly sliced | Adds sharpness and color |
| Olive oil | 2 tablespoons | For cooking chicken |
| Butter | 2 tablespoons | For toasting the wraps |
| Salt and pepper | To taste | Seasoning |
| Italian seasoning | 1 teaspoon | Complements the garlic flavor |
| Red pepper flakes | 1/4 teaspoon (optional) | For heat lovers |
| Fresh cilantro or parsley | 1/4 cup, chopped | For garnish |
Kitchen Equipment You’ll Need
Nothing fancy is required to make these wraps, but these tools will make the process smoother:
- Large skillet or frying pan
- Cutting board and sharp knife
- Cheese grater (if using block cheese)
- Measuring cups and spoons
- Mixing bowl
- Tongs (for flipping wraps)
- Spatula
Step-by-Step Preparation
Now, let’s get cooking! Here’s my detailed process for creating these mouthwatering wraps:
1. Prepare the Chicken
- Cut the chicken breasts into thin strips, about 1/2-inch thick.
- Season generously with salt, pepper, and Italian seasoning.
- Heat olive oil in a large skillet over medium-high heat.
- Add the chicken strips and cook for 5-6 minutes, turning occasionally, until golden and cooked through (internal temperature should reach 165°F/74°C).
- Add half of the minced garlic during the last minute of cooking and stir to incorporate.
- Transfer the chicken to a plate and set aside.
2. Prepare the Creamy Garlic Spread
- In a small mixing bowl, combine the cream cheese with the remaining minced garlic.
- Add a pinch of salt, pepper, and red pepper flakes (if using).
- Mix until smooth and well combined.
3. Prepare the Vegetables
- Wash and dry the spinach leaves.
- Thinly slice the red bell pepper and red onion.
- Chop the cilantro or parsley.
4. Assemble the Wraps
- Lay a tortilla flat on a clean surface.
- Spread a generous layer of the creamy garlic mixture over the entire tortilla, leaving a 1/2-inch border around the edge.
- Add a layer of spinach leaves in the center of the tortilla.
- Arrange some of the cooked chicken strips on top of the spinach.
- Sprinkle with sliced bell pepper and red onion.
- Add a generous handful of shredded cheese on top.
- Sprinkle with fresh cilantro or parsley.
5. Fold and Toast the Wraps
- Fold in the sides of the tortilla toward the center.
- Roll the tortilla from the bottom up, tucking in the sides as you go, to create a tight wrap.
- Heat butter in a large skillet over medium heat.
- Place the wraps seam-side down in the skillet and cook for 2-3 minutes per side, until golden brown and crispy, and the cheese inside has melted.
- Cut each wrap in half diagonally and serve immediately.
Nutritional Information
For those who like to keep track of their nutritional intake, here’s a breakdown per wrap:
| Nutrient | Amount per Wrap |
|---|---|
| Calories | 520 |
| Protein | 35g |
| Carbohydrates | 30g |
| Dietary Fiber | 3g |
| Sugars | 2g |
| Fat | 28g |
| Saturated Fat | 13g |
| Cholesterol | 115mg |
| Sodium | 750mg |
| Calcium | 350mg |
| Iron | 2.5mg |
| Vitamin A | 25% DV |
| Vitamin C | 60% DV |
Note: Values are approximate and may vary based on specific brands and products used.
Flavor Variations to Keep Things Interesting
One of the reasons I love this recipe is its adaptability. Here are some of my favorite variations:
Mediterranean Twist
- Replace the Italian seasoning with Greek seasoning.
- Add crumbled feta cheese instead of cheddar/mozzarella blend.
- Include some chopped Kalamata olives and diced cucumber.
- Use tzatziki sauce instead of the cream cheese spread.
Southwest Style
- Season the chicken with taco seasoning instead of Italian herbs.
- Add black beans and corn kernels.
- Use pepper jack cheese for some heat.
- Include sliced avocado or guacamole.
- Top with salsa or pico de gallo before rolling.
Buffalo Chicken Version
- Toss the cooked chicken in buffalo sauce before adding to the wrap.
- Use blue cheese or ranch dressing mixed with cream cheese for the spread.
- Add diced celery for crunch.
- Include blue cheese crumbles along with the shredded cheese.
Veggie Lover’s Option
- Replace chicken with sautéed mushrooms, zucchini, and yellow squash.
- Add roasted eggplant and cherry tomatoes.
- Use a mix of fresh herbs like basil, oregano, and thyme.
- Consider adding hummus along with the cream cheese for extra protein.
Make-Ahead and Storage Tips
I often prepare components of these wraps ahead of time to streamline weeknight dinners:
Make-Ahead Options
- Cooked chicken can be refrigerated for up to 3 days.
- The creamy garlic spread can be made 2 days in advance.
- Vegetables can be sliced and stored in airtight containers for 2-3 days.
- Cheese can be shredded and stored for up to a week.
Storage Solutions
- Fully Assembled (Uncooked) Wraps: Wrap tightly in plastic wrap and refrigerate for up to 24 hours.
- Cooked Wraps: Store in an airtight container in the refrigerator for up to 3 days.
- Freezing Option: I don’t recommend freezing fully assembled wraps as the tortillas can become soggy when thawed. However, you can freeze the cooked chicken and thaw it when ready to make fresh wraps.
Reheating Instructions
- Microwave: 1-2 minutes until heated through (wraps will be softer, not crispy).
- Oven: 10 minutes at 350°F (176°C) wrapped in foil, then unwrapped for the last 2 minutes to crisp up.
- Skillet: 2-3 minutes per side over medium-low heat until warmed through.
Serving Suggestions
These wraps are substantial enough to serve as a complete meal, but here are some suggestions for sides that pair beautifully with them:
- Fresh green salad with a light vinaigrette
- Sweet potato fries with garlic aioli
- Tomato soup for dipping
- Roasted vegetables like broccoli, Brussels sprouts, or carrots
- Coleslaw with a tangy dressing
- Fresh fruit platter for a refreshing contrast
For a casual gathering, I like to create a “wrap bar” with all the components laid out so everyone can build their own custom creation.
Common Mistakes and How to Avoid Them
Even experienced cooks can run into issues with wraps. Here are solutions to common problems:
| Problem | Cause | Solution |
|---|---|---|
| Tortilla tears when rolling | Overfilling or dry tortilla | Use less filling and/or warm tortilla briefly in microwave (10 seconds) to make it more pliable |
| Filling falls out when eating | Improper rolling technique | Fold in sides first, then roll from bottom, keeping it tight |
| Wrap is soggy | Too many wet ingredients | Drain wet ingredients thoroughly; pat tomatoes dry with paper towels |
| Cheese doesn’t melt properly | Not enough cooking time | Lower heat and cook longer to allow cheese to melt without burning the tortilla |
| Chicken is dry | Overcooking | Use a meat thermometer to avoid cooking past 165°F (74°C); consider using chicken thighs instead of breasts |
| Wrap doesn’t stay closed | Not sealing properly | Place the wrap seam-side down first when cooking to seal it; use a toothpick to hold it together if necessary |
Time-Saving Tips for Busy Weeknights
When time is short but hunger is real, try these shortcuts:
- Use rotisserie chicken or pre-cooked chicken strips from the grocery store.
- Keep pre-shredded cheese on hand (though freshly shredded melts better).
- Use jarred minced garlic.
- Buy pre-washed baby spinach.
- Consider prepared sauces or spreads to replace the homemade cream cheese mixture.
- Use a panini press to cook both sides of the wrap simultaneously.
Questions and Answers
Based on the feedback and questions I’ve received from readers who’ve tried this recipe, here are the most common queries:
Can I make these wraps gluten-free? Yes! Simply substitute the regular flour tortillas with gluten-free tortillas. Some brands are better than others, so you might need to experiment to find one that’s pliable enough to wrap without breaking.
How can I make these wraps healthier? Use whole wheat tortillas, reduce the amount of cheese, increase the vegetables, use Greek yogurt instead of cream cheese for the spread, and opt for lean chicken breast.
My kids don’t like vegetables. How can I adapt this recipe for them? Try finely chopping or even grating the vegetables to make them less noticeable. You might also consider starting with just one vegetable they typically enjoy and gradually introducing others over time.
Can I use a different protein instead of chicken? Absolutely! Cooked ground beef, turkey, steak strips, or even fish like salmon or shrimp work well. For vegetarian options, try black beans, chickpeas, or tofu.
The wraps fall apart when I try to flip them. What am I doing wrong? Make sure you’re not overfilling them and that you’re folding in the sides before rolling. Also, placing them seam-side down first in the pan helps seal them shut.
Can I bake these instead of cooking them in a skillet? Yes! Place the assembled wraps seam-side down on a baking sheet, brush with a little oil or melted butter, and bake at 400°F (200°C) for about 10-12 minutes until crispy and golden.
How spicy are these wraps? As written, the recipe is very mild. The red pepper flakes are optional, so you can adjust the heat level to your preference by adding more or omitting them entirely.
The Perfect Cheesy Garlic Chicken Wrap: My Final Tips
After making these wraps countless times, I’ve developed a few extra tips that can take them from good to exceptional:
- Toast the tortillas lightly before filling them to add another layer of flavor and improve their structural integrity.
- Let the chicken rest for a few minutes after cooking and before slicing to keep it juicy.
- Consider texture contrasts when choosing fillings – something creamy, something crunchy, something chewy.
- Don’t skimp on the garlic – it’s the star flavor here. If you’re concerned about garlic breath, roasted garlic offers a milder, sweeter flavor than raw.
- Grate your own cheese rather than using pre-shredded. Pre-shredded cheese contains anti-caking agents that can prevent it from melting as smoothly.
- Press down gently on the wrap while it’s cooking to ensure even browning and to help the cheese melt thoroughly.
- Let the wrapped tortilla rest for a minute or two before cutting to allow the melted cheese to set slightly, which helps hold everything together.
Cheesy Garlic Chicken Wraps have saved many a weeknight dinner in my household. They’re quick enough for busy evenings, satisfying enough for hungry appetites, and versatile enough to never get boring. The combination of savory chicken, melted cheese, and aromatic garlic creates a flavor profile that’s both comforting and exciting.
Whether you follow my recipe exactly or use it as a template for your own creative variations, I hope these wraps bring as much joy to your table as they have to mine. Happy cooking!